Parametric products
A parametric product is driven by numbers and formulas. The customer enters dimensions and picks a few options; the size, price, weight and bill of materials are all calculated. You build it in a visual Builder with a live preview of exactly what the customer will see — no code.
The Builder
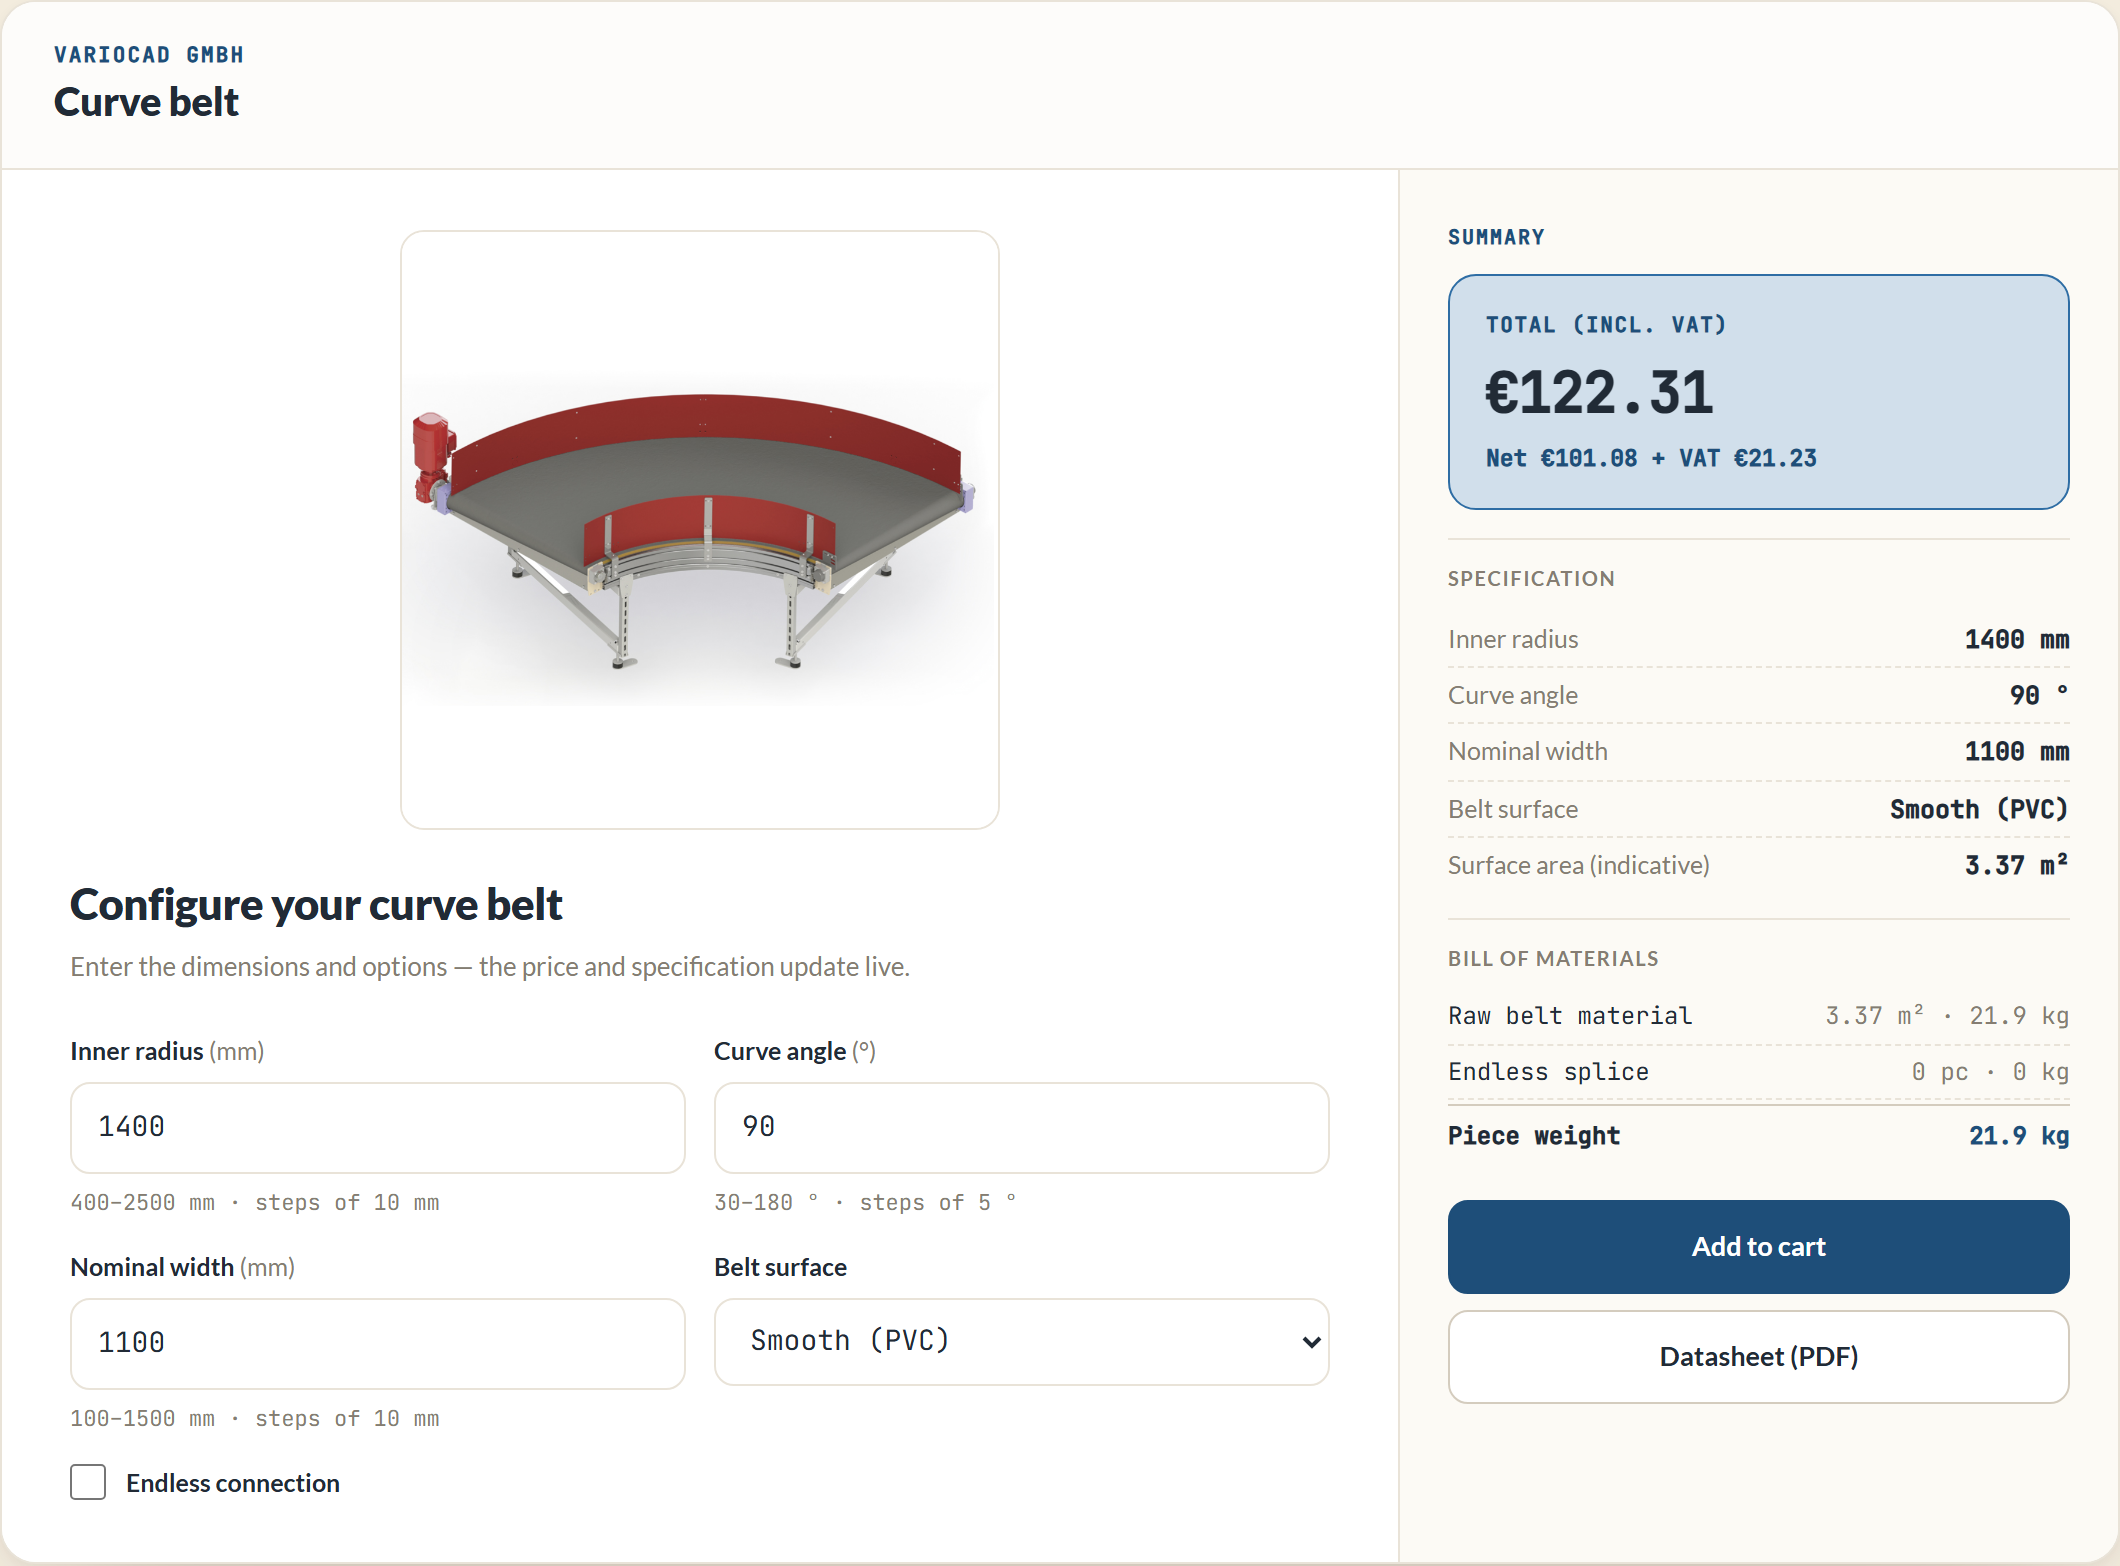
Open a parametric product's Builder tab. Start from a template (Blank, Belt, Cushion, Panel, Door), then edit on the left while the preview on the right updates as you type. Every block has a small "i" you can hover for a one-line explanation, and a header you can click to fold it away.
Fields — what the customer enters
Each field is one input. There are three types:
- Number — a dimension, with an optional unit and an optional minimum, maximum and step. Example: an inner radius in mm, from 400 to 2500, in steps of 10. The customer can't enter a value outside those limits.
- Choice — a dropdown of options. Each option can add a flat price, and can carry named values used in calculations (see below).
- Yes / No — a toggle. In calculations it counts as 1 (on) or 0 (off).
Drag the handle to reorder fields. A field's key (a short name like inner_radius) is how you refer to it in formulas.
Named values on a choice
A choice option can carry numbers you use in formulas. For a "Belt surface" choice with options Smooth and Structured, you might give each a value named rate_m2 (the price per m²) and density_kg_m2 (the weight per m²). In a formula you then refer to them as the choice's key plus the value name — for example surface.rate_m2 and surface.density_kg_m2. The Builder shows you the exact names to use.
Calculated values
These are numbers worked out from the fields, with a safe formula — an area, a perimeter, a volume, a weight. They show in the preview and on the datasheet, and you can use them in the price. For a curved belt, the surface area is:
area_m2 = (angle / 360) * pi * (pow(inner_radius + nominal_width, 2) - pow(inner_radius, 2)) / 1000000The formula language is deliberately small and safe: plain arithmetic, a handful of functions (min, max, round, sqrt, pow, …) and the constant pi. The Builder lists every value you can use and autocompletes as you type.
How it's priced
In the How is it priced? block, choose one of two modes:
- Rules (the friendly default) — build the price from plain lines: a base amount, a rate times a measurement (for example area times a per-m² rate), a surcharge when an option is on, a volume discount, a minimum order. Each line shows in the price breakdown, and a price added by a chosen option is included automatically.
- Formula (advanced) — a single expression over the fields and calculated values.
Two helpers live in the same block: Formula help (the operators, functions and values you can use) and Test prices — pin a configuration whose price you know, and it re-checks on every edit, turning red if a change ever breaks it.
Datasheet figure
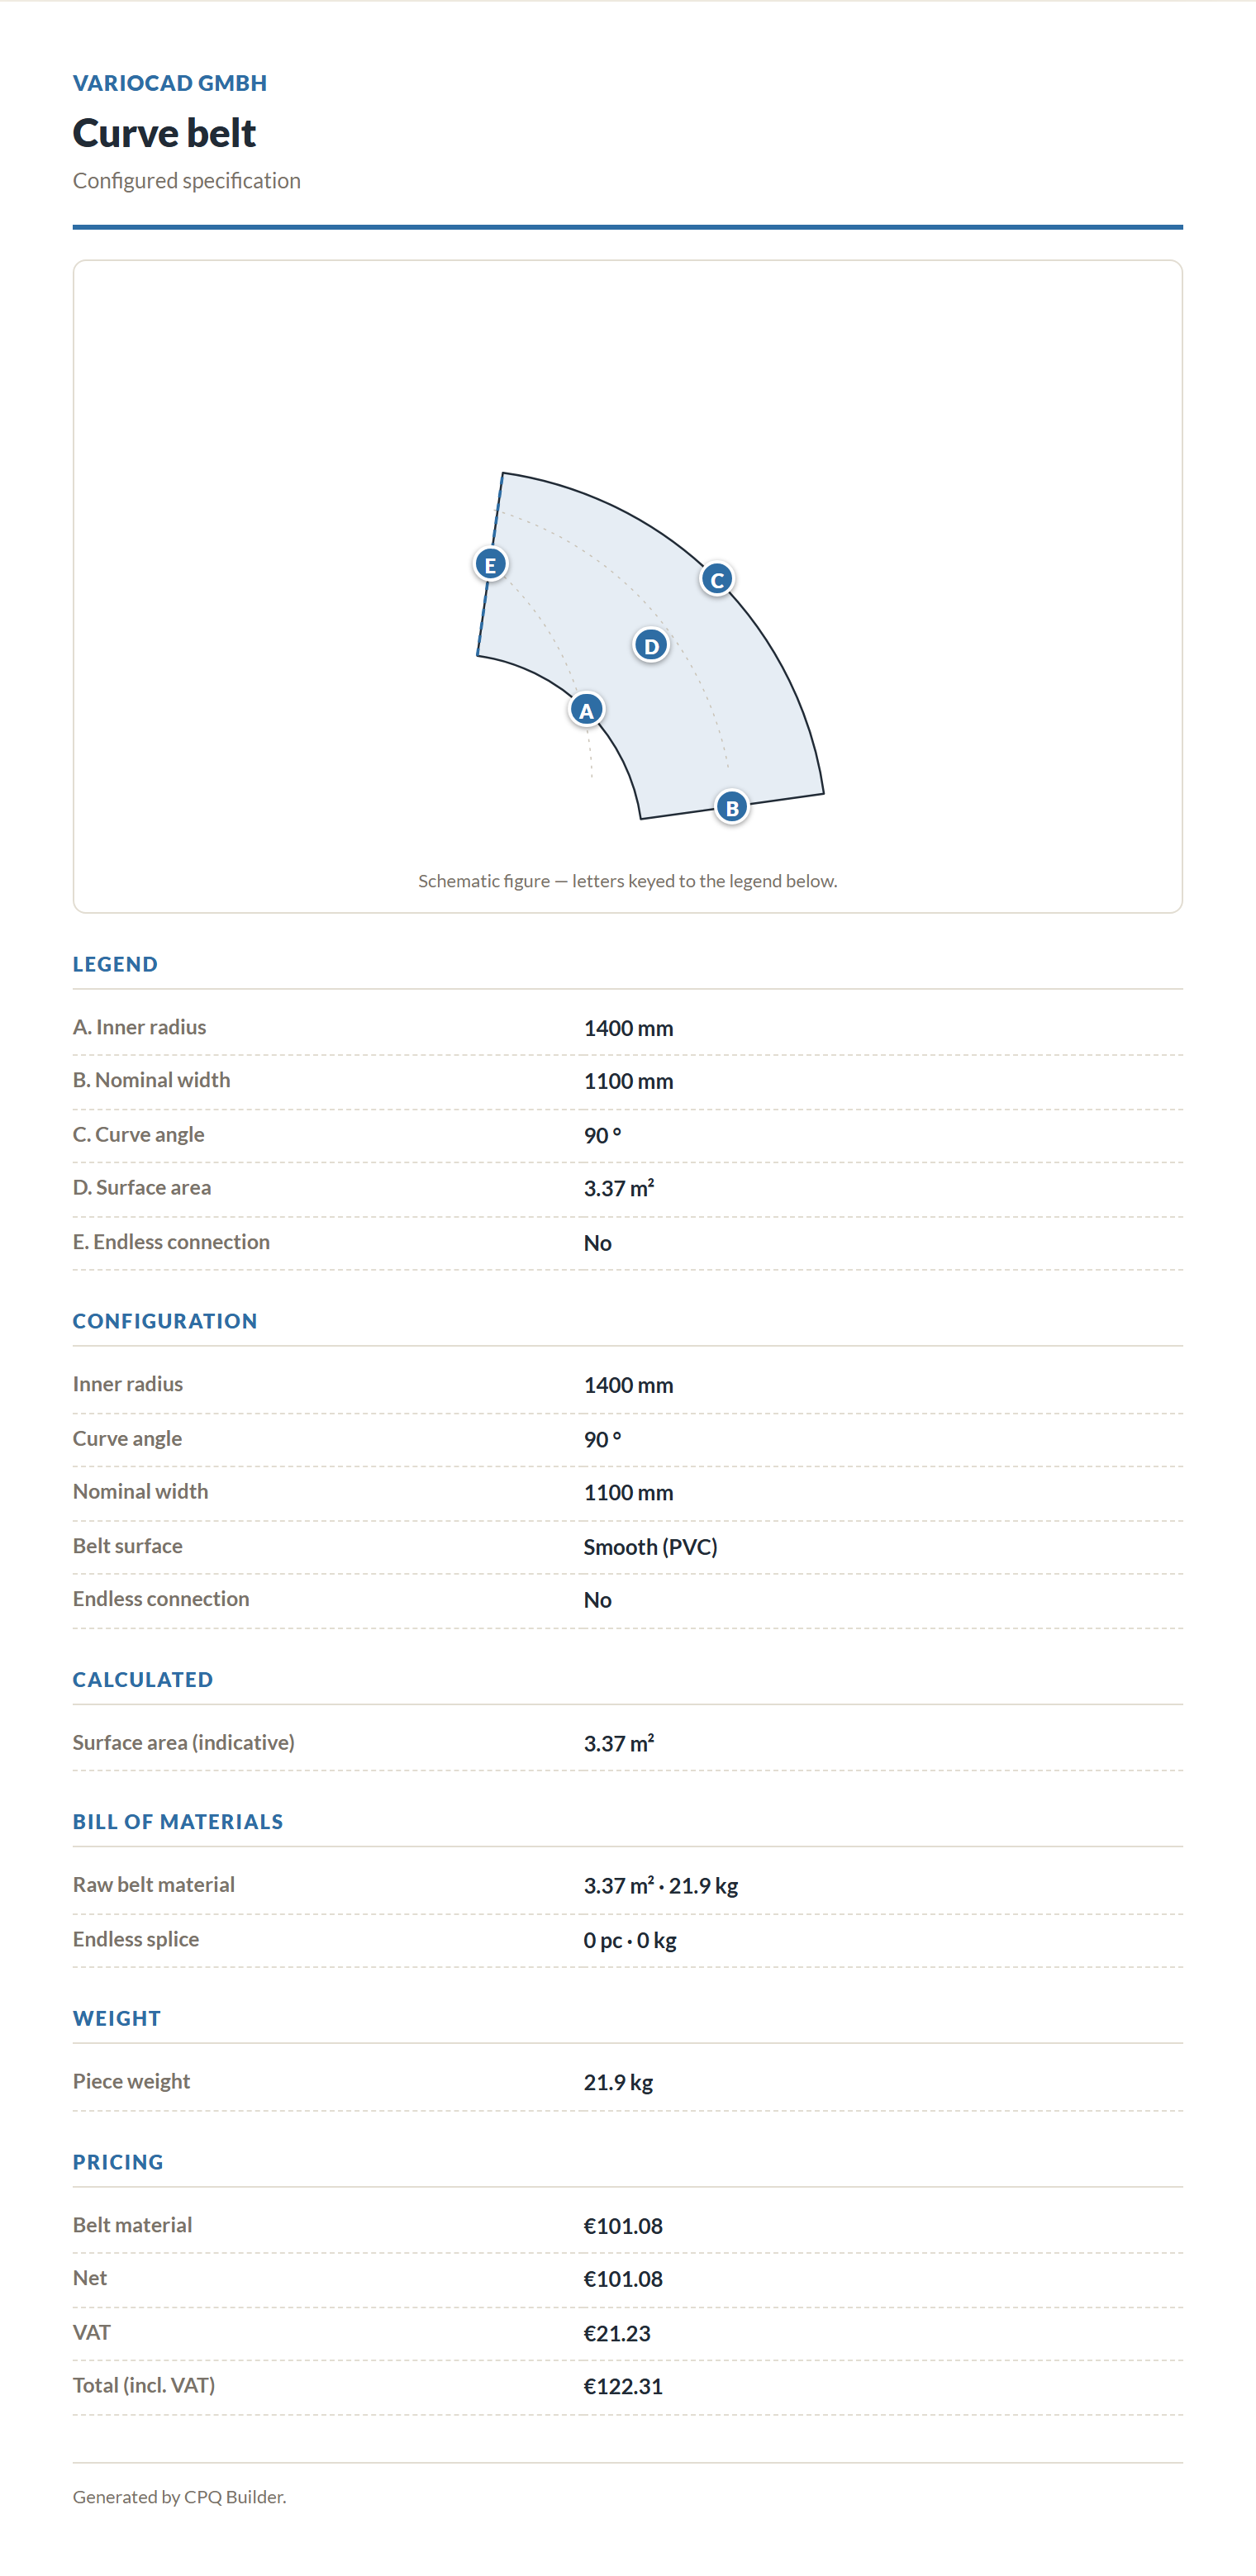
The configurator's Datasheet (PDF) button produces a one-page spec sheet with a figure, lettered callouts (A, B, C…) and a legend. In the Datasheet image block choose how the figure is made:
- Upload — your own drawing or photo, then click it to drop lettered callouts on the dimensions.
- Draw automatically — pick a shape (a sector for a curved belt, a box for a panel or door) and CPQ Builder draws a clean schematic; click it to drop callouts. No image needed.
Product image
A photo shown to the customer at the top of the configurator. Set it on the Overview tab — the same place option-picking products manage their image. Uploads save automatically.
Bill of materials
The Bill of materials block lists the components used per configured unit. Each line has:
- a component name, shown to the customer;
- a quantity, as a formula over the fields and calculated values (for example the belt area);
- a unit (m, m², m³, pc);
- an optional weight per unit (kg per that unit) — a number, or a value from a choice such as the surface density. When set, CPQ Builder works out the piece weight for you and shows it in the configurator and on the datasheet. Handy for cut-to-size pricing and shipping;
- an optional Odoo product code — pick an existing product from a live, searchable list so the line maps to the right product in your shop;
- an optional link to an operation (below).
Operations
Operations are the manufacturing steps. Each has a work centre (pick it from your Odoo, or type a new one) and a time in minutes. The time is a formula, so it can scale with the configuration — for example a cutting time that grows with the belt area. Link a component to an operation, or leave operations standalone. With Odoo, operations and their times flow into the order.
Everything in the bill of materials and operations is optional — leave it empty and nothing extra shows.
Indicative vs exact
The formula language is small on purpose, so some real-world geometry can only be approximate. Where that's the case, label the value as indicative (the belt's surface area is, for example). It's fine for a self-service quote; the exact engineering can follow off-line.
Going live
When the preview looks right, set the product to active and publish it — see Publishing to your shop.