Option-picking products
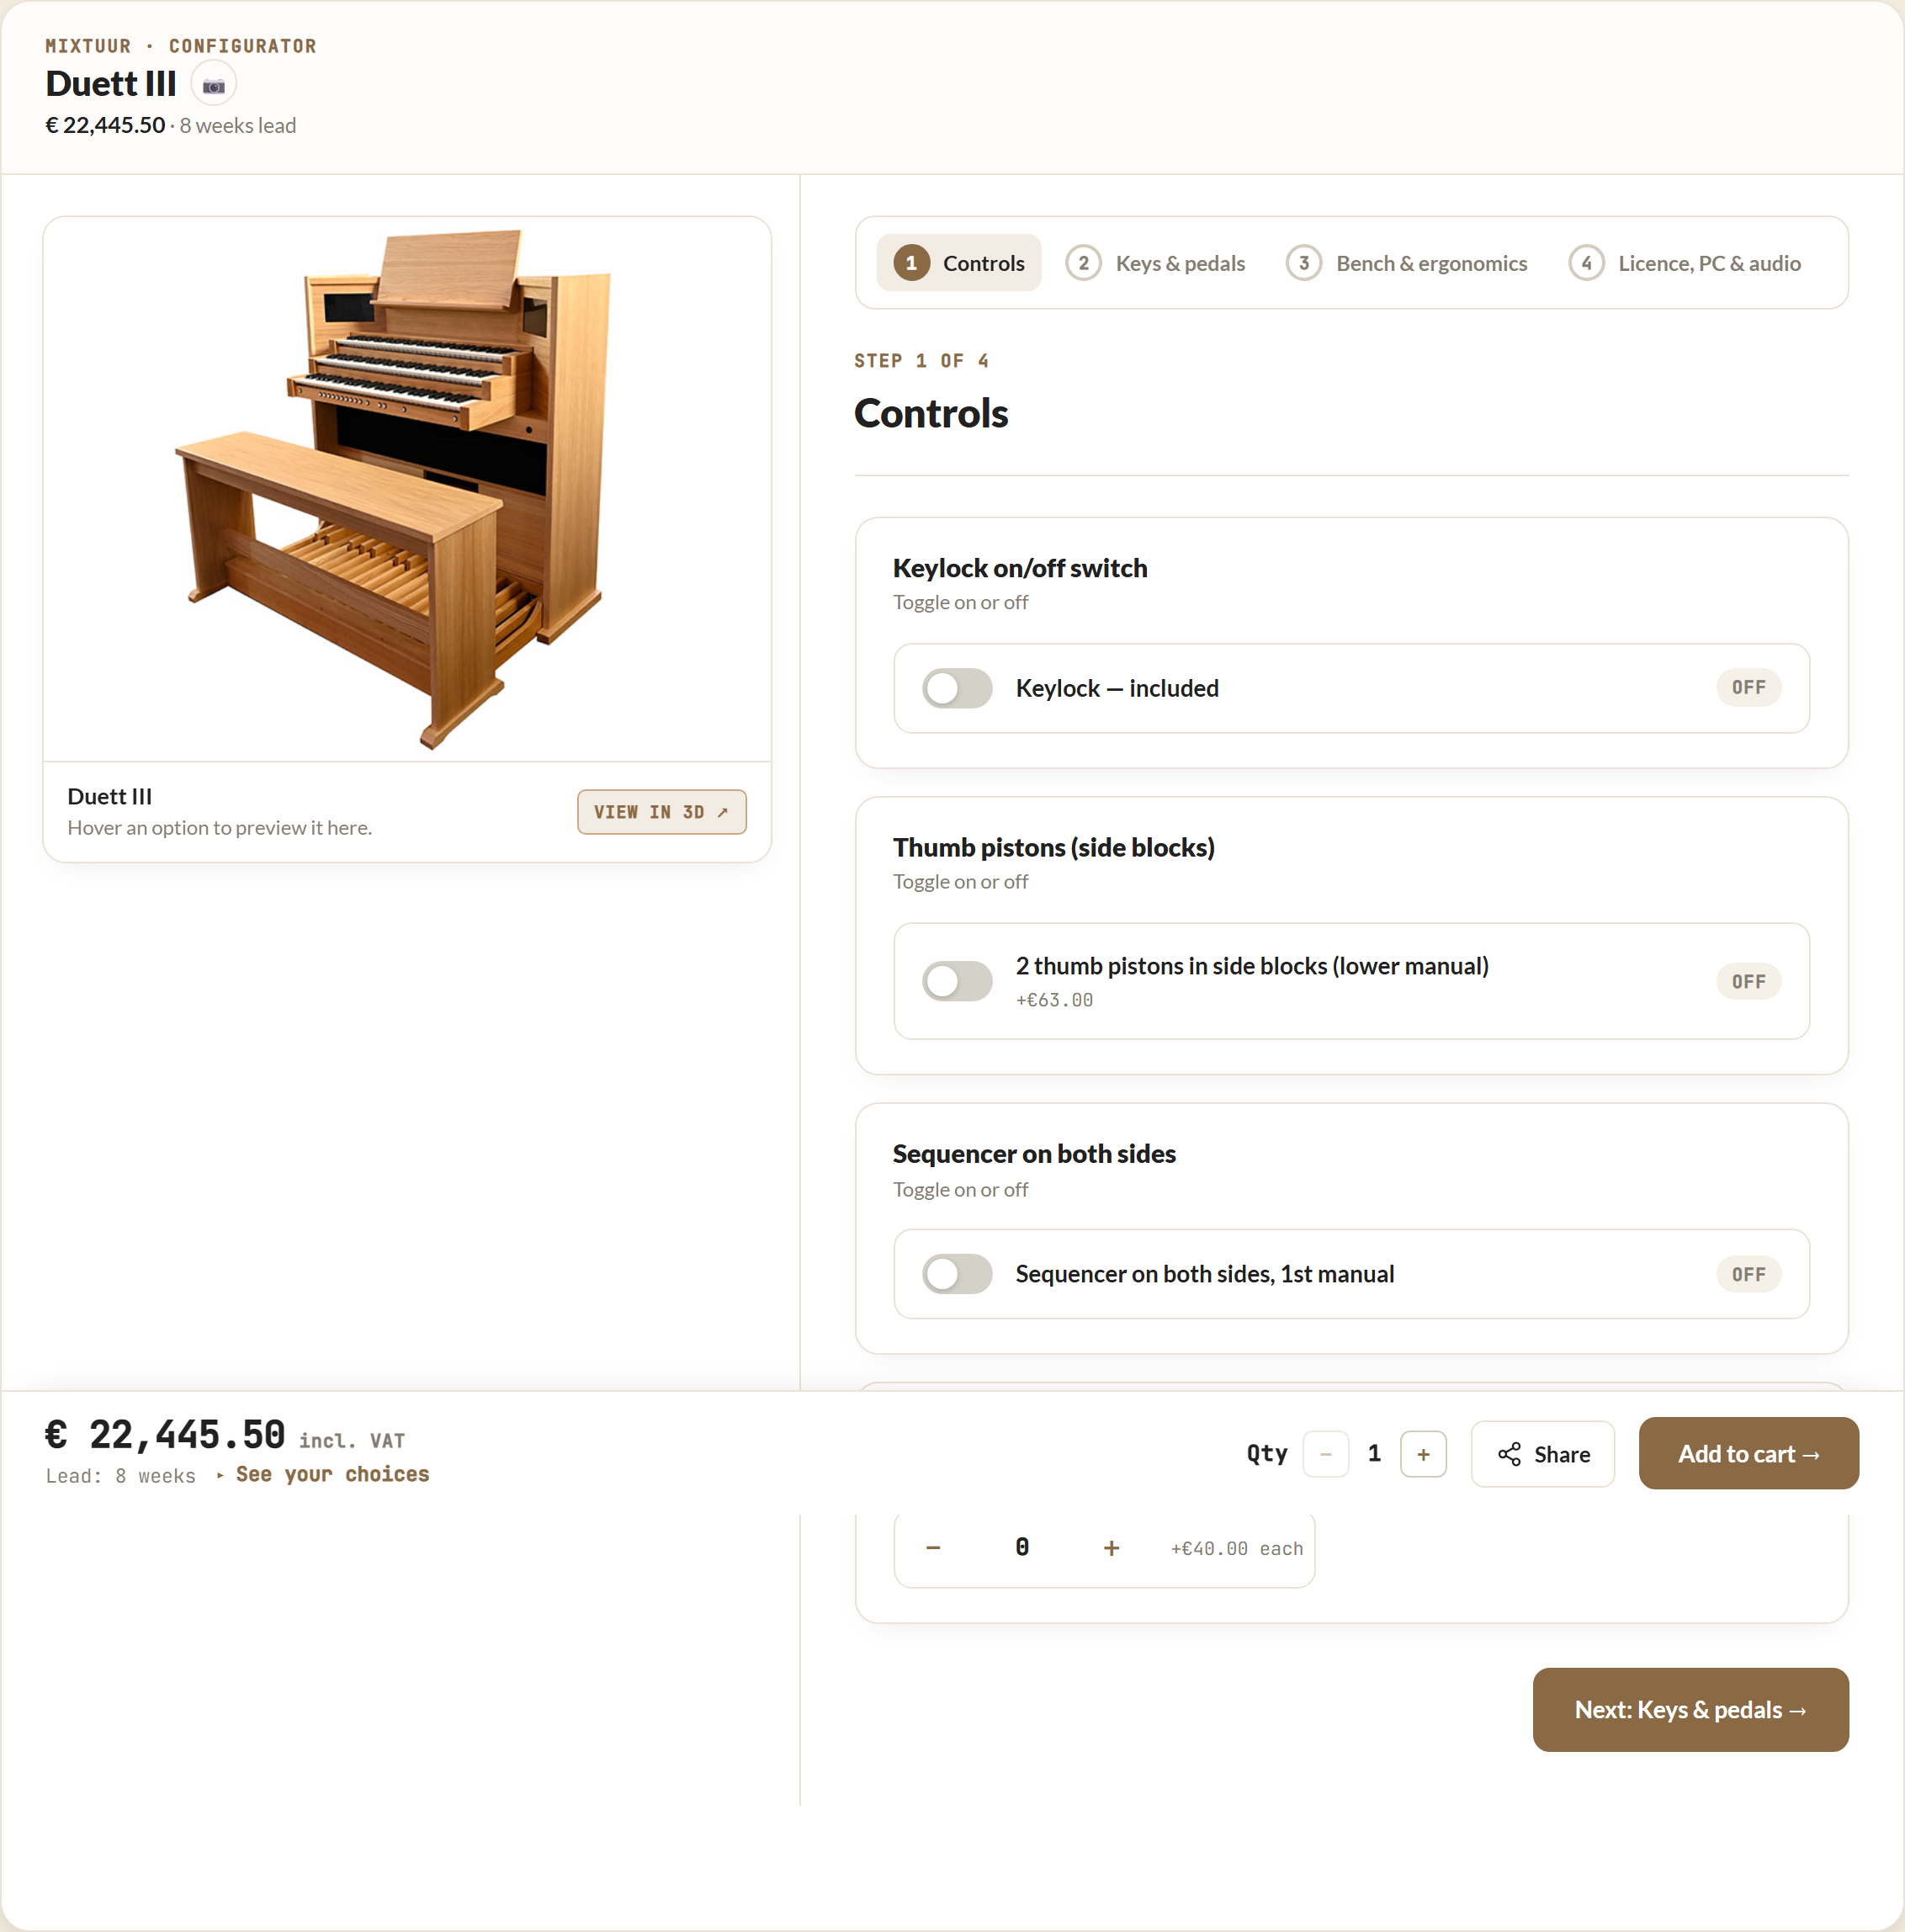
An option-picking product is built from choices. The customer works through them one step at a time and sees the price update as they go.
How it's organised
Three levels, from the outside in:
- Groups — the steps of the configurator (for example "Base model", "Controls", "Audio"). Each group is one step.
- Attributes — a single decision inside a group (for example "Foot piston" or "Speakers").
- Options — the choices for an attribute (for example "Silver", "Black", "Brass").
You create groups on the Attributes & Options tab, add attributes to them, and add options to each attribute.
Groups and attributes can each carry an optional instructional note — a short line of guidance shown to the customer under the step title (for a group) or under the attribute name (for an attribute), for example "Choose one type, or get in touch for a custom finish." It's informative only and never affects the price.
How a customer makes a choice
Each attribute has a selector that decides how the choice looks:
- Single choice — pick exactly one (buttons, or a dropdown when there are many).
- Multiple choice — tick any number.
- Yes / No — a single on/off toggle for an add-on.
- Quantity — a number (how many of something), with a minimum, maximum and step.
CPQ Builder picks a sensible selector for you; you can override it.
What each option carries
For every option you can set:
- a label the customer sees;
- a price added when it's chosen — it can be negative too, for a discount or a credit;
- an optional lead time added in weeks;
- an optional image (a thumbnail). When the customer hovers an option, the preview swaps to its picture — great for finishes and colours;
- a default — the option selected when the configurator opens.
The product's starting price plus the chosen options make the total. The customer always sees the same total your order will use.
Rules between options
Some combinations don't make sense together, or one choice forces another. Add rules on the Rules tab:
- Exclude — "if A is chosen, B can't be." The configurator greys B out and explains why.
- Require — "if A is chosen, B is required." It can tick B automatically.
- Recommend — "if A is chosen, B is a good idea." B is highlighted, never forced.
Instead of one option, the When side can be a whole attribute: pick nothing selected in this attribute or anything selected in this attribute from the option dropdown. That's how you make one option depend on another question being answered at all — an exclude on nothing selected keeps the option greyed out until the customer picks something there. Example: an installation discount that only applies to samplesets stays unavailable while the samplesets question is empty, and becomes available the moment a sampleset is chosen. One rule covers every sampleset, so adding a new one needs no rule changes.
Rules are read top to bottom; the first matching rule wins, so order them from most to least specific.
Images
On the Overview tab you set the product's main image (the hero) and a gallery. The hero shows before the configurator opens; the gallery and per-option thumbnails appear inside it. Per-option thumbnails are optional but make finishes and colours much easier to choose.
Bill of materials
The bill of materials is what the product is actually made of. It's optional, and mostly relevant if you manufacture and use Odoo. On the Bill of materials tab you can:
- list components — each can point at a product in your Odoo (pick it from a live, searchable list), carry a thumbnail, and link to an operation;
- list operations — a manufacturing step with a work centre (also pickable from your Odoo) and a time in minutes;
- have an option add components to the order when it's picked — one option can add several components in different quantities (e.g. "extra pedal" adds 2 circuit boards + 1 pedal). The quantity is multiplied by the picked count for qty-selectors;
- set the operation for each component an option adds — it defaults to the component's own operation, but you can override it so the same component is consumed in a different step (e.g. always-on boards go to assembly, a board added by "screen" goes to screen mounting). The same component in the same operation is merged into one line; in different operations it stays on separate lines;
- give a component an Always on BOM (qty) — it then lands on every order's bill of materials at that quantity, regardless of the options chosen (e.g. an organ always needs 2 circuit boards). Decimals are allowed for measured components. Always-on and option-added quantities of the same component + operation add up into a single line.
When a customer orders, CPQ Builder writes this bill of materials, with its operations, into the Odoo order so a manufacturing order can be created automatically. See Publishing to your shop.
Layout
Each product can use one of two layouts (set on the Products list):
- Three-column — a step list, the choices, and a running summary. Best for technical products with many attributes.
- Side-by-side — a large product image next to the choices. Best when the picture carries the decision.
Either way the same price and the same order result — pick whichever reads better.
Going live
When the product looks right, set it to active and publish it — see Publishing to your shop.